[siteorigin_widget class=”SiteOrigin_Widget_Image_Widget”][/siteorigin_widget]
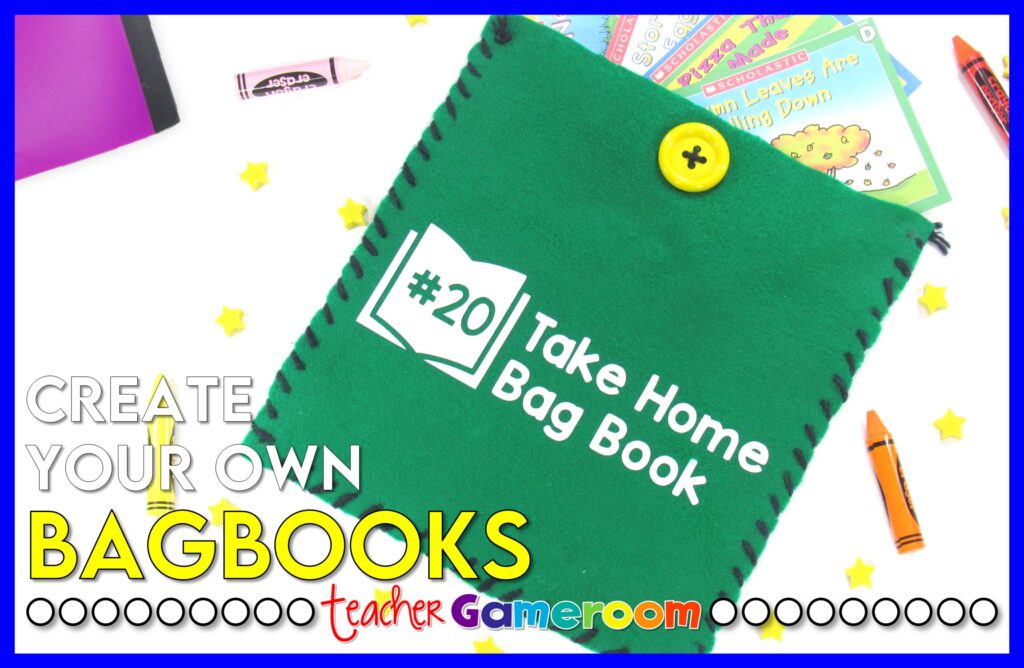
What kind of bagbooks do you have in your classroom? Fabric ones from education websites? Plastic ones made from Zip-lock gallon bags and decorative tape? Here’s a third option and it’s easier than you think! Made almost entirely from materials you can find at your local dollar store, these bag books make a great summer project for any K-2 teacher.
Let’s get started!
Project: Bagbooks
INSPIRATION: My sister asked me to make something for her to study with while she was in nursing school. She wanted to me to make layers of the skin using felt, tie them together, and label each layer. While I made it, I remember thinking about my nephew’s school bagbook a few years ago. My niece used a sandwich bag and it was very bland.
[siteorigin_widget class=”SiteOrigin_Widget_Image_Widget”][/siteorigin_widget]
Gather your Supplies!
Here are the materials you need to get started. Some are optional. All you really need is felt, yarn/hot glue, needle, and a closure (ex buttons, Velcro, etc). Labels are options but they Extra materials are helpful.
Materials Needed:
– Cricut Machine
– EasyPress or Iron
– Yarn or Hot Glue
– Needle
– Ruler or Tape Measure
– Buttons or Some type of closure
– Felt
– Heat Transfer Vinyl (HTV)
– Scissor
– Markers
For the bagbooks I made, I used either black or white as the back and used colored felt for the front. Feel free to choose any combination. To close the bagbook, you can choose to use needle and yarn or use a hot glue gun (they run about $3 – $5). The choice is up to you.
[siteorigin_widget class=”SiteOrigin_Widget_Image_Widget”][/siteorigin_widget]
Design the Labels!
Create your template on Cricut Design Space. Flaticon.com has tons of free templates you can choose from. I got all my designs from there. Choose the fonts you want to display. You can use student’s names, your name, room number, whatever! Personally, I like using the student’s name. You can collect them at the end of the year and make a great end of the year giftbag. Make sure your design fits your bagbook by measuring the length of the felt. I like to make my design 1 -2 inch less long wise so in this case, my design cannot be bigger than 8 inches.
[siteorigin_widget class=”SiteOrigin_Widget_Image_Widget”][/siteorigin_widget]
[siteorigin_widget class=”SiteOrigin_Widget_Image_Widget”][/siteorigin_widget]
Cut it Out!
Cut out your design. Set your material type to iron-on you (HTV) on your Cricut. MAKE SURE TO MIRROR YOUR DESIGN. I’ve wasted so much Heat Transfer Vinyl because of this.
[siteorigin_widget class=”SiteOrigin_Widget_Image_Widget”][/siteorigin_widget]
[siteorigin_widget class=”SiteOrigin_Widget_Image_Widget”][/siteorigin_widget]
Once the cricut is finished cutting out, weed the extra vinyl away. Choose where you want to place your design and use your EasyPress/iron on the design. A few presses should work fine. Let the design cool before carefully removing the plastic. If you need to apply more heat, do so at your discretion.
[siteorigin_widget class=”SiteOrigin_Widget_Image_Widget”][/siteorigin_widget]
[siteorigin_widget class=”SiteOrigin_Widget_Image_Widget”][/siteorigin_widget]
[siteorigin_widget class=”SiteOrigin_Widget_Image_Widget”][/siteorigin_widget]
[siteorigin_widget class=”SiteOrigin_Widget_Image_Widget”][/siteorigin_widget]
Creating the Top of the Bagbook
Let’s design the felt itself. There are different yarn designs you can add to your felt. I have two designs and they start off the same. Using a permanent marker and a ruler, measure 1/2 inch from the side and make a dot mark. From there, add a dot every 1/2 inch. You only need to do this for one felt square for each pair.
[siteorigin_widget class=”SiteOrigin_Widget_Image_Widget”][/siteorigin_widget]
[siteorigin_widget class=”SiteOrigin_Widget_Image_Widget”][/siteorigin_widget]
[siteorigin_widget class=”SiteOrigin_Widget_Image_Widget”][/siteorigin_widget]
Next, we’ll make a flap for the top of the bag book. Choose the type of flap you want (ex. square, rectangle, semi-circle, etc). Here, we’ll make a trapezoid flap (like an envelope).
Create a triangle on both sides of the back felt (the piece that closes the bagbooks) using the marker and ruler. Pictured below, I did this on the pink felt (the front of the bagbook), but it still worked out. Cut the triangles out on both sides. On the front felt, cut straight across so the flap can fold down over the front.
[siteorigin_widget class=”SiteOrigin_Widget_Image_Widget”][/siteorigin_widget]
[siteorigin_widget class=”SiteOrigin_Widget_Image_Widget”][/siteorigin_widget]
[siteorigin_widget class=”SiteOrigin_Widget_Image_Widget”][/siteorigin_widget]
[siteorigin_widget class=”SiteOrigin_Widget_Image_Widget”][/siteorigin_widget]
Creating the Bottom of the Bagbook
Time to put the two together. You can sew or use hot glue. If you choose the hot glue, it’s pretty self exclamatory. Glue along the 3 sides (not the top and flap). Let it cool before testing.
If you don’t know how to sew, there’s no time like the present. You’ll need a thick needle with the wider hole for threading yarn. Thread your needle and tie a knot at the end of the yarn. I would do about 3 feet to 5 feet of yarn, depending on the design you choose.
Starting from the back, poke a hole in the first black mark and pull the yarn through. It will be hard to pull through so when you poke the needle through the felt, wiggle the needle around a little bit to create more room. Next, poke the needle through the front felt to the back felt, pulling the yard through. Use the method (back to front, front to back, back to front, front to back) for the pink design.
[siteorigin_widget class=”SiteOrigin_Widget_Image_Widget”][/siteorigin_widget]
Continue your needlework until you reach the last dot. Tie a knot in the yarn and cut off the extra yarn.
[siteorigin_widget class=”SiteOrigin_Widget_Image_Widget”][/siteorigin_widget]
If you want the green design, start from the back, pull the needle and yarn through. Then, go around and come from the back again. The pattern should be back to front, back to front, back to front, etc.
[siteorigin_widget class=”SiteOrigin_Widget_Image_Widget”][/siteorigin_widget]
Adding a Closure
Time to apply the closure. This is what keeps the bagbook closed. You can choose to use buttons, Velcro, or whatever you think is convenient. Keep your students in mind. It may be harder for a kindergartener to use a button than it would be a 2nd grade student. I used buttons and if you don’t know how to sew a button, it is VERY simple. If you sewed your bagbook, it’s exactly the same!
Before we actually sew the button, decide the size and type. Many stores have big buttons, small buttons, star buttons, square buttons. I decided to use large button since it will be used for tiny hands.
[siteorigin_widget class=”SiteOrigin_Widget_Image_Widget”][/siteorigin_widget]
To sew a button, start by threading the needle and yarn. Starting from the FRONT FELT ONLY, thread the yarn through the felt AND the button. Pull the yarn. Now sew through one of the holes of the button and through the felt. Repeat the process until you’re confident the button is secure. (Pattern should be felt through button, button through felt). Tie a knot on the inside of the bagbook and cut the excess yarn.
Next, pull the flap down over the button. Mark where to cut a small hole. Cut it with the scissors. The hole does not have to be very big. Make it wide enough to get the button through.
[siteorigin_widget class=”SiteOrigin_Widget_Image_Widget”][/siteorigin_widget]
[siteorigin_widget class=”SiteOrigin_Widget_Image_Widget”][/siteorigin_widget]
Test it out!
You’re done. Marvel at the beauty! Last things to do: Test out your bag book. Add some printable books, reading highlighters, and ELA worksheets to go in the bagbook.
If all is good, you make as many as you need. Experiment with different needle work to get different designs. Use patterned or glitter felt for more variety. You can even use different fabrics. This makes a great summer project.
Don’t forget to pin this project for later and let me know in the comments below what other classroom porjects you’d like to see made with the cricut.
[siteorigin_widget class=”SiteOrigin_Widget_Image_Widget”][/siteorigin_widget]


[siteorigin_widget class=”SiteOrigin_Widget_PostCarousel_Widget”][/siteorigin_widget]